When you’re building or upgrading your RV solar system, one of the most valuable things you can do is add a dedicated DC load shunt. This allows you to monitor exactly how much power your RV’s 12V system is drawing — lights, fans, fridge, water pump, and everything in between.
If you’re running a Victron Lynx Distributor, you already have a clean and modular DC bus setup. Adding a shunt between the Lynx and your RV’s DC distribution panel gives you the ability to view your real-time system load right on your Cerbo GX or VictronConnect app.
Here’s how to do it step by step.
Step 1: Understand What the Shunt Does
A shunt is a precision resistor that measures current flow. When installed correctly, it tells your Victron monitoring system exactly how much current is moving through that cable — in this case, the total load feeding your RV’s 12V distribution panel.
This lets you see real-time usage, identify heavy loads, and optimize your battery performance.
Step 2: Identify Your DC Load Path
On a typical Victron setup, your Lynx Distributor handles the main DC connections:
- One side feeds your batteries (via SmartShunt or Lynx Shunt).
- The other side feeds your inverter, solar charge controllers, and DC distribution fuse panel.
You’ll be installing this second shunt on the cable feeding your RV’s DC distribution panel (the load side).
So the flow looks like this:
Battery → Lynx Distributor → Shunt → RV DC Fuse Panel
Step 3: Mount the Shunt
- Turn off all power sources (battery disconnects, solar breakers, etc.).
- Locate a clean spot near your Lynx Distributor to mount the shunt — ideally within a few inches to minimize cable length.
- Use appropriately sized lugs and wire — match the same gauge as your existing DC feed to the panel.
- Connect:
- The input side of the shunt to the Lynx output terminal that feeds the RV’s DC panel.
- The output side of the shunt to the cable leading to the DC distribution/fuse block.
Make sure the connections are clean, torqued properly, and that the shunt is mounted securely on a non-conductive surface.
Step 4: Connect the Shunt to Your System
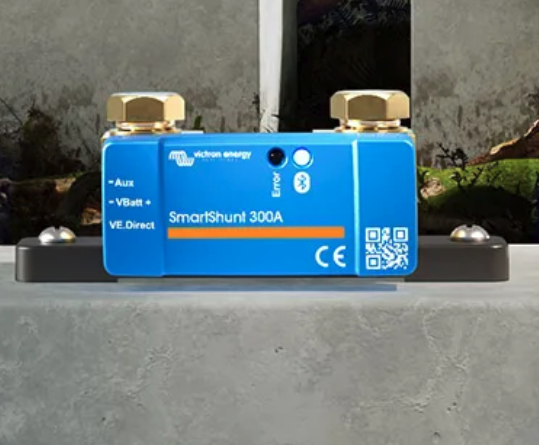
If you’re using a Victron SmartShunt, it will communicate via VE.Direct to your Cerbo GX or via Bluetooth to your phone.
Plug the VE.Direct cable from the shunt into an available VE.Direct port on your Cerbo GX.
Step 5: Configure the Shunt Settings
Now, let’s tell your system that this isn’t a battery shunt — it’s a DC system shunt.
- On your Cerbo GX screen or in the VRM portal, go to:
Settings → System Setup → DC System → Enable “Has DC system” - Set the new shunt’s function to “DC System” and the meter type to “DC Loads”.
- Rename it something clear like “RV DC Loads” so you can identify it later.
Once that’s done, a DC Load Tile will appear on your Cerbo GX home screen, showing live amps, watts, and power usage.
Step 6: Verify and Fine-Tune
Turn your system back on, and start turning on DC loads (lights, fans, water pump, etc.). You should now see the DC Load tile showing positive amperage flow when the RV draws power.
If the readings seem reversed, simply swap the shunt’s sense direction in the settings or reverse the cables (power off first).
Step 7: Why This Matters
Adding a dedicated DC load shunt gives you valuable visibility into your system’s behavior. You’ll instantly know:
- How much your DC appliances are drawing in real-time.
- When high loads (like fridge or furnace fans) are running.
- How your system behaves overnight or while boondocking.
It’s a simple upgrade that turns your RV’s power system from “educated guesswork” into precision monitoring — helping you make smarter decisions and extend your off-grid time.
Recommended Gear
- Victron SmartShunt (300A or 500A)
- VE.Direct to USB or Cerbo GX cable
- Appropriate fuse and wire gauge (match your DC feed line)
Adding a DC load shunt may only take an hour, but the insight it gives lasts the life of your system.
Whether you’re fine-tuning your solar setup or just want to know what’s drawing power, this small addition pays off every time you hit the road.
Need help designing or upgrading your RV’s off-grid power system?
At Cascade RV Solar Solutions, we help you understand your system — not just install it.
Check out our custom solutions at cascadesolarrvsolutions.com.


